Enter your GoDaddy username and password, then click “Sign In.”
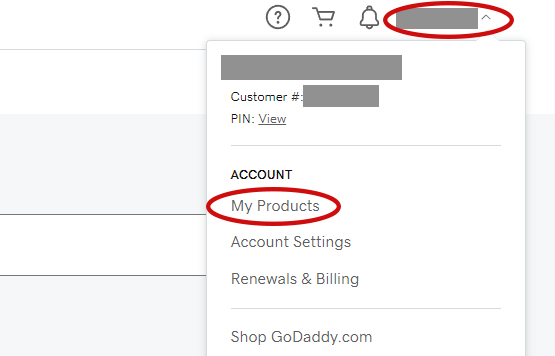
Step 2: Access Your Domain Settings
Once logged in, click on your account name at the top-right corner, and from the drop-down menu, select “My Products.”
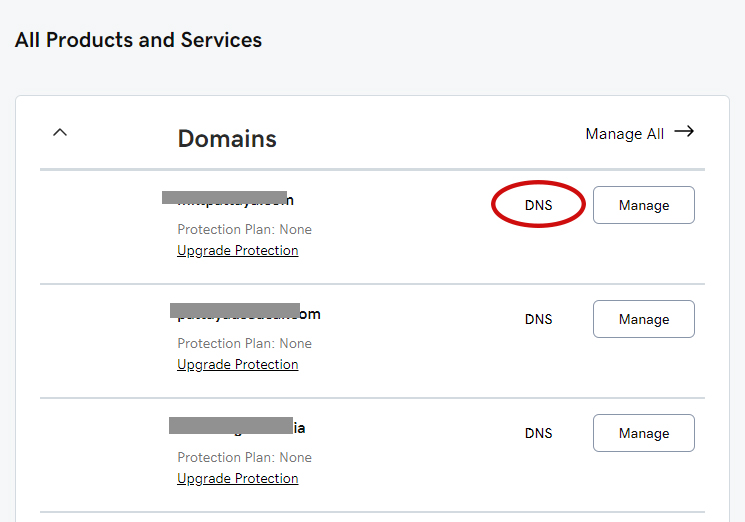
Step 3: Locate Your Domains
In the “Products” section, you will see a list of your purchased domains. Find the domain for which you want to update the nameservers and click on “DNS“.
Step 4: Open Domain Settings
In the domain management dashboard, you will find various options. Look for “Nameservers” and click on it.
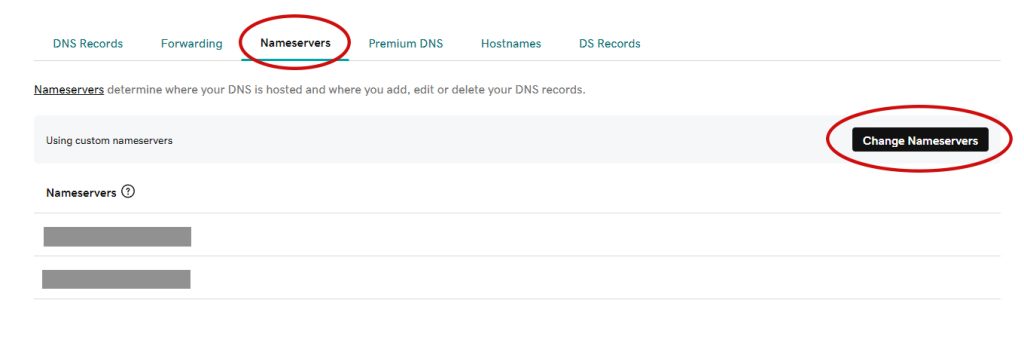
Step 5: Update Nameservers
You will see the current nameservers associated with your domain. To update them, click on the “Change” button.
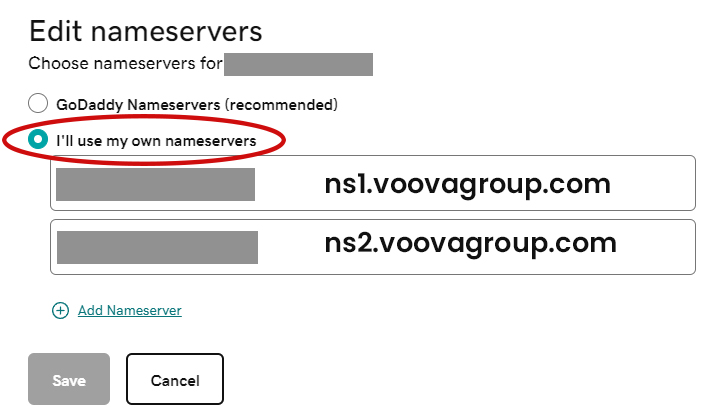
Step 6: Enter Nameservers
Select the option to “Enter my own nameservers” or “Use custom nameservers” (the wording may vary slightly).
You’ll now have the option to enter the new nameserver information.
In the provided fields, enter the nameserver, you will need to enter at least two nameservers
ns1.voovagroup.com
ns2.voovagroup.com
ns3.voovagroup.com
ns4.voovagroup.com
Verify Nameserver Update
It may take some time for the nameserver changes to propagate across the internet. This process can vary, but it generally takes a few hours to 48 hours for the changes to fully take effect.
You can use online DNS lookup tools to verify that your domain is now using the updated nameservers.